Coconut Velvet Cake
Prep Time: 30 minutes | Bake Time: 30 minutes | Assembly Time: 20 minutes | Serves: 12–16
You know how some cakes just look like a cake? Nice enough. Tastes fine. Gets eaten. Forgotten by Thursday.
And then there are cakes that make people stop talking mid-sentence when they see them come out. Cakes that get asked about at every gathering they attend. Cakes that someone will text you about three weeks later saying — hey, can I have that recipe again?
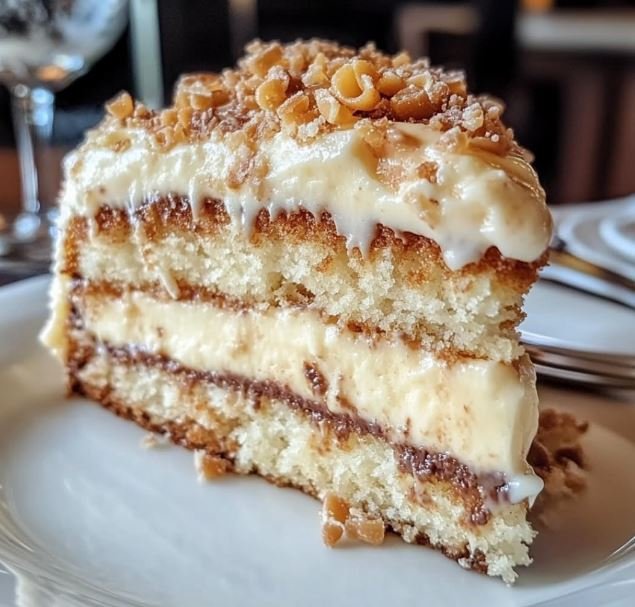
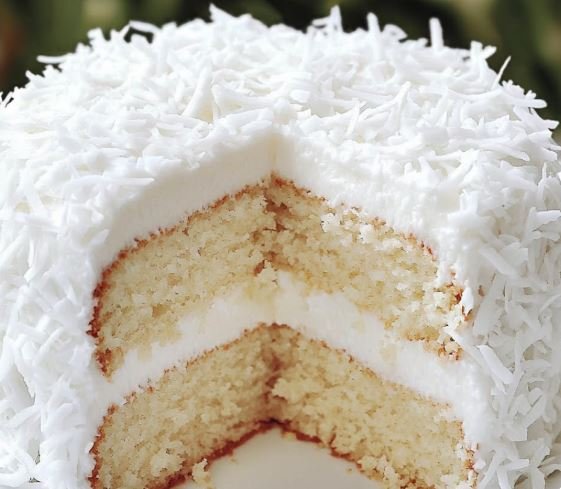
This Coconut Velvet Cake is that second kind of cake. A tall, stunning three-layer showstopper with a crumb so impossibly soft and fine that it almost does not feel real — deeply flavored with coconut milk and pure coconut extract all the way through — covered in a billowy, marshmallowy seven-minute frosting that is glossy and white and dramatic, and then blanketed entirely in coconut. Toasted or not, sweetened or not — either way, the finished cake looks like something out of a Southern bakery window, and tastes even better than it looks.
I need you to make this cake. Preferably soon.
Why This Cake Is Different
I have made a lot of coconut cakes in my time. Coconut layer cakes, coconut sheet cakes, coconut cupcakes, a coconut poke cake that I still think about in my sleep. But there is something about the velvet cake technique that takes coconut to a completely different level — and once you try it, the other versions feel like they were missing something.
Here is what makes a velvet cake different. The combination of cream cheese in the batter, buttermilk for tenderness, and the precise balance of fat and liquid creates a crumb that is so fine, so soft, so uniformly moist that it genuinely has a texture closer to a mousse than a regular cake layer. Not dense — light. Not wet — just perfectly, ideally moist in a way that holds up beautifully for days without drying out. It is the kind of texture that makes people say « how did you DO this » and then look slightly disbelieving when you explain.
Add coconut milk and coconut extract to that already extraordinary base, and you end up with a cake that is deeply, genuinely coconut-flavored from first bite to last — not in a candy-artificial way, but in a warm, tropical, real-ingredient way that is quietly spectacular.
And the seven-minute frosting. Can we talk about that for a second? It is light, it is glossy, it has a faint marshmallow quality that clings to the outside of the cake like a cloud, and it makes this cake look absolutely spectacular. It is the frosting this cake was born for.
A Quick Note on Velvet Cakes
If you have never made a velvet cake before, the concept might feel a little unfamiliar. The « velvet » family of cakes — red velvet, white velvet, lemon velvet, chocolate velvet — all share the same foundational philosophy: acidic ingredients (buttermilk, cream cheese, vinegar) react with the leavening in the batter and with the proteins in the flour to create a crumb that is unusually fine, soft, and smooth. Velvety, in other words. It is an older technique from American baking that fell out of fashion for a while and then came roaring back, and for very good reason.
The cream cheese is the secret weapon here. Not just for flavor — though it does add a subtle richness — but for texture. The mild acidity and high fat content of cream cheese does something extraordinary to the gluten in the flour, tenderizing it in a way that produces a crumb that is unlike any other cake you have ever made. People notice it immediately. They just cannot always put their finger on exactly what it is.
Now you know.
What Makes This Recipe Work
- Coconut milk instead of regular milk — full-fat canned coconut milk replaces the liquid in the batter and infuses every single bite with a rich, deep coconut flavor that you cannot get from extract alone. This is the foundation of everything. Use full-fat, not light — the fat content is part of what makes the crumb so tender and luxurious.
- Cream cheese in the batter — not just in the frosting, but in the cake itself. This is the velvet technique, and it is what gives this cake that impossibly soft, fine crumb and a richness that is hard to describe until you have tasted it. Do not skip it and do not substitute it.
- Buttermilk alongside the coconut milk — the acidity of buttermilk works alongside the cream cheese to create layers of tenderness in the crumb. Two acidic ingredients together might sound like too much, but the balance is carefully calibrated and the result is a cake that stays moist for days longer than most layer cakes.
- Both vanilla and coconut extract — coconut extract alone can taste slightly artificial in large quantities. Vanilla extract alongside it rounds out the flavor, adds warmth, and makes the coconut taste more natural and complex. Both are necessary.
- Seven-minute frosting — also called boiled frosting or Italian meringue, this frosting is made by beating hot sugar syrup into whipped egg whites until you get a glossy, stable, marshmallow-like frosting that is light as air and holds its shape beautifully. It is the traditional frosting for Southern coconut cake and it is absolutely perfect here. It is not difficult — it just requires a candy thermometer and a little patience.
- Toasted coconut on the outside — pressing toasted coconut all over the frosted cake adds texture, a deeper nutty coconut flavor, and a dramatic, beautiful appearance that makes this cake genuinely stunning on a table.
Ingredients
For the Coconut Velvet Cake Layers
- 2 ½ cups (315g) cake flour (not all-purpose — cake flour is essential for the velvet texture)
- 1 ½ cups (300g) granulated sugar
- 1 tsp baking soda
- 1 tsp baking powder
- ½ tsp fine salt
- 4 oz (115g) full-fat cream cheese, softened to room temperature
- ½ cup (120ml) vegetable oil
- 2 tbsp shortening
- 2 tsp pure vanilla extract
- 1 tsp pure coconut extract
- 2 large eggs, room temperature
- 2 large egg whites, room temperature
- ½ cup (120ml) full-fat canned coconut milk
- ½ cup (120ml) buttermilk, room temperature
For the Seven-Minute Frosting
- 1 ½ cups (300g) granulated sugar
- ¼ tsp cream of tartar (or 1 tsp light corn syrup)
- ⅓ cup (80ml) water
- 3 large egg whites, room temperature
- 1 tsp pure vanilla extract
- 1 tsp pure coconut extract
- A pinch of fine salt
For the Coconut Topping
- 2 to 3 cups sweetened shredded coconut (for covering the outside of the cake)
- ½ cup additional coconut, toasted, for the top (optional but beautiful)
Instructions
Step 1 — Prep and Preheat
Preheat your oven to 325°F (165°C). Grease and flour three 8-inch round cake pans, then line the bottoms with circles of parchment paper. Set aside.
The lower temperature is intentional — velvet cakes bake more evenly and stay more moist at 325°F than at the standard 350°F. Do not be tempted to raise it to speed things up.
Step 2 — Make the Cake Batter
In a medium bowl, sift together the cake flour, baking soda, baking powder, and salt. Set aside.
In the bowl of a stand mixer fitted with the paddle attachment, beat together the vegetable oil, shortening, softened cream cheese, vanilla extract, and coconut extract on medium speed for about 2 minutes until completely smooth, light, and well combined. The cream cheese should be fully incorporated with no lumps. Add the sugar and beat for another 2 minutes.
Add the whole eggs and egg whites one at a time, beating well after each addition and scraping down the sides of the bowl as needed. The batter should look smooth and glossy at this point.
In a small bowl or measuring cup, whisk together the coconut milk and buttermilk. With the mixer on low speed, add the dry ingredients to the butter mixture in three additions, alternating with the coconut milk mixture, beginning and ending with the dry ingredients. Mix just until each addition is combined — do not overmix. The batter will be smooth and pourable.
Step 3 — Bake
Divide the batter evenly among the three prepared pans. Tap each pan firmly on the counter a couple of times to release any air bubbles. Bake for 28 to 33 minutes, until a toothpick inserted in the center comes out clean or with just a few moist crumbs, and the cake springs back lightly when pressed in the center.
Let the cakes cool in the pans on a wire rack for 15 minutes, then turn them out onto the rack, peel off the parchment, and allow them to cool completely before frosting. Completely means completely — a warm cake will melt the frosting and your beautiful layers will slide.
If you have the time, wrap the cooled layers in plastic wrap and refrigerate them for an hour before assembling. Cold cake layers are firmer, easier to handle, and take the frosting more cleanly.
Step 4 — Toast the Coconut (Optional but Worth It)
Spread the coconut for the topping on a dry baking sheet in a thin, even layer. Toast in a 350°F oven for 5 to 7 minutes, stirring once or twice, until it is golden brown and fragrant. Watch it carefully — coconut goes from pale to burned quickly and it does not recover. Transfer immediately to a plate or bowl to stop the cooking.
If you prefer the sweeter, softer look of untoasted coconut on the outside, that is completely valid and very beautiful. Toasted gives more flavor and crunch. Your cake, your call.
Step 5 — Make the Seven-Minute Frosting
This is the step that feels a little intimidating the first time and then becomes deeply satisfying every time after that. You will need a candy thermometer.
Make sure your mixing bowl and beaters are completely clean and grease-free — even a trace of fat will prevent the egg whites from whipping properly.
Place the egg whites, vanilla extract, coconut extract, and salt in the bowl of your stand mixer fitted with the whisk attachment. Set aside without mixing.
In a small saucepan, combine the sugar, cream of tartar, and water over medium-high heat. Do not stir — just let it heat. The mixture will bubble and become clear as the sugar dissolves. Heat until the syrup reaches exactly 240°F (115°C) on a candy thermometer — this is soft-ball stage, and the temperature matters. Too low and the frosting will not be stable. Too high and it will be grainy.
The moment the syrup hits 240°F, start beating the egg whites on high speed. With the mixer running, immediately pour the hot syrup into the egg whites in a thin, steady stream down the side of the bowl — not directly onto the whisk or it will spray everywhere. Continue beating on high speed for 7 minutes, until the frosting is thick, glossy, white, and holds stiff peaks. It should look luminous and feel light as a cloud. Beat in the vanilla and coconut extracts.
Use the frosting immediately — it begins to set as it cools and becomes harder to spread once it stiffens.
Step 6 — Assemble the Cake
Place one cake layer on your serving plate or cake stand. Spread a generous layer of seven-minute frosting evenly over the top, going all the way to the edges. Press a small handful of shredded coconut lightly into the frosting layer. Repeat with the second layer. Place the third layer on top.
Using an offset spatula, frost the top and sides of the entire cake with the remaining frosting in smooth, generous sweeps. Work confidently and quickly — the frosting is easiest to work with when it is fresh and warm. If it starts to stiffen, dip your spatula in warm water and smooth it gently over the surface.
Step 7 — Cover in Coconut
This is the moment the cake becomes truly beautiful. Take handfuls of shredded coconut — toasted, untoasted, or a combination of both — and press it gently but firmly all over the sides and top of the frosted cake. The coconut sticks easily to the fresh frosting. Cover every inch. Do not hold back.
Step back and look at what you made. It is spectacular. I am not being dramatic.
Allow the cake to sit at room temperature for at least 30 minutes before slicing so the frosting has time to set slightly and the layers settle into each other.
Recipe Notes
- Cake flour is non-negotiable here. All-purpose flour makes a noticeably coarser, less tender crumb in this recipe. Cake flour has a lower protein content, which means less gluten development and a finer, more delicate texture. If you genuinely cannot find it, you can approximate it: for every cup of all-purpose flour, remove 2 tablespoons and replace with 2 tablespoons of cornstarch. But real cake flour is better.
- Everything at room temperature. Cold eggs, cold cream cheese, and cold buttermilk do not incorporate properly and can cause the batter to look curdled. Take everything out of the refrigerator at least 45 to 60 minutes before you start.
- Full-fat coconut milk only. Light coconut milk does not have enough fat to give the batter the richness and tenderness it needs. Use full-fat canned coconut milk — shake the can first or give it a good stir since the fat and liquid can separate in the can.
- The seven-minute frosting sets quickly. Have your cake layers assembled and ready to frost before you start making the frosting. Work quickly once it is done — it begins to stiffen within 20 to 30 minutes of being made. If it becomes too stiff before you finish, you cannot restart it.
- A candy thermometer is not optional. The syrup for the seven-minute frosting must reach exactly 240°F. An underheated syrup produces frosting that weeps and does not hold. An overheated syrup produces a grainy, stiff result. A thermometer removes all guesswork and makes the whole process stress-free.
- Cold cake layers are easier to work with. If you have the time, refrigerate your baked, cooled cake layers for an hour before assembling. They are firmer, less crumbly, and take the frosting more cleanly. This is particularly helpful if your kitchen is warm.
- Toasting half the coconut gives the best result. My preference is to press untoasted sweetened coconut all over the sides of the cake for that classic, fluffy white appearance, and then scatter golden toasted coconut over the top for visual contrast and extra flavor. The combination is beautiful and delicious.
Variations
Coconut Lime Velvet Cake — Add the zest of 2 limes and 2 tablespoons of fresh lime juice to the batter. Add another tablespoon of lime juice to the seven-minute frosting before it is fully beaten. The lime cuts through the richness of the coconut with a bright, tropical freshness that is absolutely stunning. This version is made for summer.
Pineapple Coconut Velvet Cake — Spread a thin layer of well-drained crushed pineapple over the frosting between each cake layer before adding the next. The sweet, slightly tart pineapple against the coconut frosting tastes like a piña colada in cake form. I am not sorry for how good this sounds, because it is exactly that good.
Chocolate Coconut Velvet Cake — Replace ¼ cup of the cake flour with ¼ cup of Dutch-process cocoa powder and proceed as directed. The subtle chocolate note against the coconut creates a deep, complex flavor combination that chocolate-coconut lovers will obsess over. Think Mounds bar as a layer cake.
Coconut Cream Cheese Frosting Version — If seven-minute frosting feels like too much for a first attempt, swap it for a coconut cream cheese frosting: beat 16 oz softened cream cheese with 1 cup softened butter, 4 cups sifted powdered sugar, 1 teaspoon coconut extract, and 1 teaspoon vanilla extract until silky and smooth. It is richer and denser than the seven-minute version but equally delicious and much more forgiving to work with.
Mini Coconut Velvet Cakes — Bake the batter in a muffin tin for 18 to 20 minutes to make individual coconut velvet cupcakes. Frost with the cream cheese frosting version above — the seven-minute frosting is beautiful on cupcakes too but requires quick work. Roll the tops in toasted coconut and serve on a tiered stand for an elegant party dessert.
Lemon Coconut Velvet Cake — Add 2 tablespoons of fresh lemon zest and 1 tablespoon of fresh lemon juice to the batter alongside the coconut flavoring. The lemon brightens the coconut flavor and adds a citrus lift that makes this version feel lighter and more refreshing. Perfect for Easter or a spring celebration.
Make-Ahead Tips
This cake is wonderfully forgiving for advance preparation:
- Bake the cake layers up to 2 days ahead. Wrap the fully cooled layers tightly in plastic wrap and refrigerate. They actually slice more cleanly after a day in the refrigerator and the flavor deepens slightly.
- Freeze the cake layers for up to 3 months. Wrap individually in plastic wrap, then foil. Thaw overnight in the refrigerator before assembling. Frozen and thawed cake layers are often easier to frost than fresh ones because they are drier and more stable.
- The seven-minute frosting cannot be made ahead. It sets as it cools and cannot be re-beaten once stiff. Make it immediately before you assemble and frost the cake.
- Assemble the full cake up to 24 hours ahead. Once frosted and covered in coconut, cover loosely with plastic wrap and refrigerate overnight. The flavors meld and the layers settle into each other beautifully. Bring to room temperature for 30 to 60 minutes before serving.
What to Serve With It
Honestly, this cake is the event. It does not need help. But if you are hosting and want to build around it:
- Strong black coffee or a rich espresso — the bitterness is a beautiful counterpoint to the sweetness of the coconut
- A simple scoop of vanilla bean ice cream alongside a slice for dessert if you are feeling particularly indulgent
- Sparkling wine or prosecco for a celebration — the bubbles cut through the richness perfectly
- Fresh tropical fruit — mango, papaya, pineapple — arranged on the serving plate for a beautiful, colorful presentation
Storage
Room temperature: This cake can sit at room temperature for up to 2 hours before serving — the frosting holds up well in a cool environment. For longer storage, refrigerate.
Refrigerator: Cover loosely with a cake dome or plastic wrap and refrigerate for up to 5 days. This is one of those cakes that genuinely tastes better on day two — the coconut flavor deepens, the layers meld together, and the frosting softens slightly into the cake in the best possible way. Remove from the refrigerator 45 minutes to 1 hour before serving to let the frosting soften and the cake come to room temperature.
Freezer: Freeze individual slices wrapped tightly in plastic wrap and then foil for up to 2 months. Thaw in the refrigerator overnight or at room temperature for an hour. The seven-minute frosting holds up surprisingly well after freezing.
One last thing. If you are making this cake for someone — for a birthday, for a celebration, for no reason at all except that you love them and want to show it — know that this is a cake that delivers. The kind that makes people feel genuinely cared for in the way that only a really beautiful, really delicious homemade cake can. That is not nothing. That is actually everything.
Did you make this Coconut Velvet Cake? Leave a comment below and tell me how it went — and whether the seven-minute frosting was as satisfying to make as I promised it would be. Tag us on social media. We love seeing your stunning cakes. 🥥🎂✨